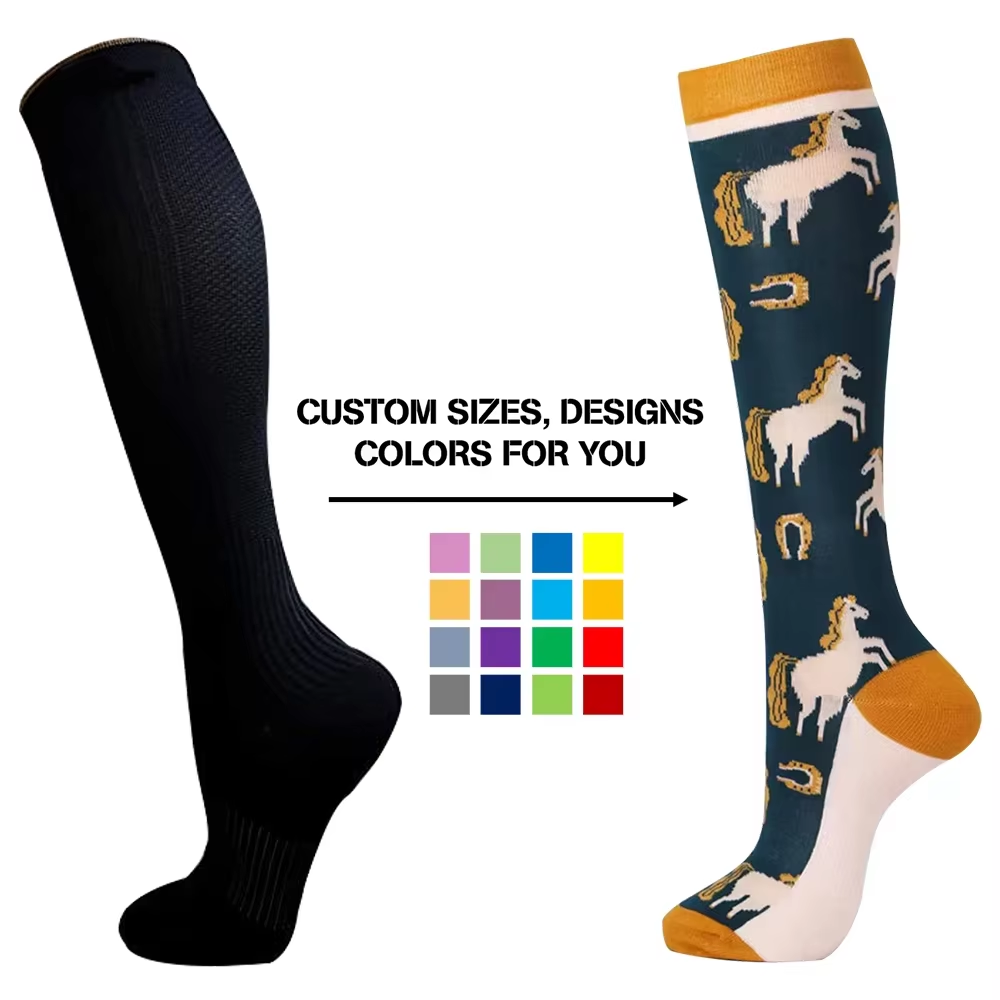
De juiste stabilisatie- en hoopingmethode kiezen voor aangepaste geborduurde sokken
Keuze van steunstof: lichtgewicht scheurbare versus doorsnijdbare steunstof voor weefselintegriteit en behoud van details
Het kiezen van de juiste steunstof maakt alle verschil als het gaat om het behouden van de rekbaarheid van sokken, terwijl de fraaie geborduurde ontwerpen intact blijven. Wegtreksteunstoffen werken uitstekend voor eenvoudige toepassingen met weinig steken op rekbaar materiaal, omdat ze na het borduren schoon verwijderd kunnen worden zonder extra dikte achter te laten. Deze zijn echter minder geschikt voor ingewikkelde patronen of veel dichte stiksel, omdat ze tijdens het spannen in de borduurhoop of bij normaal dragen gewoon niet voldoende steun bieden. Snijd-af-steunstoffen bieden daarentegen een andere oplossing: ze worden feitelijk permanent onderdeel van de stof en houden alles bij elkaar, zelfs na meerdere wasbeurten. Bij het werken aan gedetailleerde, op maat gemaakte geborduurde sokken is deze keuzedilemma onvermijdelijk. Wegtreksteunstoffen zorgen voor een nette, natuurlijk vallende uitstraling, maar zijn op lange termijn niet duurzaam. Snijd-af-steunstoffen staan zeker de tand des tijds, maar maken de stof wel wat stugger — een effect dat vooral duidelijk merkbaar is bij die uiterst dunne avond- en dresssokken waar we allemaal van houden.
Drijvende borduurtechnieken en speciale sokkenborduurringen: een evenwicht vinden tussen spanningsregeling en nauwkeurigheid bij fijne details
Reguliere hoopingmethoden rekken elastische sokmateriaal vaak te veel uit, waardoor de vezeluitlijning verstoord raakt en de steken van koers raken. De 'floating'-aanpak lost deze problemen op door alleen het steunmateriaal in de hoop te bevestigen, terwijl de sok zelf los boven de hoop hangt. Dit behoudt de natuurlijke spanning van de stof en voorkomt vervelende plooiingen rond fijne details zoals borduurwerk met 1,5 mm hoge tekst. Bij productieomgevingen kunnen fabrikanten profiteren van speciale sokhoops met compressiegebieden die precies de vorm van een voet hebben. Deze gespecialiseerde gereedschappen verminderen positioneringsfouten met ongeveer 40 procent ten opzichte van standaardhoops. Floating hooping werkt het beste voor unieke of hoogwaardige sokontwerpen. Voor gestandaardiseerde massaproductie is het aanbevolen om speciale hoops te gebruiken, omdat deze snellere insteltijden en consistente resultaten over grote series mogelijk maken.
Belangrijke overwegingen voor stabilisatie bij op maat gemaakte geborduurde sokken :
| Factor | Uit scheurbaar steunmateriaal | Uitgesneden stabilisator |
|---|---|---|
| De complexiteit van het ontwerp | Best geschikt voor ≤5.000 steken | Vereist voor >5.000 steken |
| Invloed op de stof | Verwijdering zonder restanten | Permanente versterking |
| Behoud van detail | Ondersteuning met matige dichtheid | Integriteit met hoge dichtheid |
| Wassen Duurzaamheid | 15–20 cycli | 50+ cycli |
Optimale plaatsing en afmeting van het ontwerp voor op maat geborduurde sokken
De "⅓-regel": strategische zones voor manchetplaatsing die draagbaarheid en nauwkeurige leesbaarheid van details behouden
Beperk alle borduurwerk tot het bovenste deel van de sokmanchet, ideaal gezien tot ongeveer een derde of minder van de totale lengte van de sok. De reden? Dit gebied rekt weinig tijdens het dragen van de sokken, waardoor de steken beter blijven zitten over de tijd. Onderzoek wijst uit dat ontwerpen die worden geplaatst in de bovenste drie centimeter van standaard crewsocks, nog steeds leesbaar blijven in ongeveer 98% van de gevallen, zelfs na vijftig wasbeurten. Ga echter niet verder dan het enkelbeen, want als u deze grens van één derde overschrijdt, kunnen vervelende plooien ontstaan en breken de draadjes sneller door de constante buiging en draaiing die onze voeten gedurende de dag ondergaan. Bovendien blijven ontwerpen boven de enkel zichtbaar, ongeacht of iemand ze draagt met sneakers of met die chique loafers die af en toe tevoorschijn worden gehaald voor speciale gelegenheden.
Gebieden met hoog risico om te vermijden: waarom de hiel-, teen- en geribbelde zones de details van op maat gemaakte geborduurde sokken vervormen
De hiel- en teengebieden ondergaan elke dag allerlei belasting door wrijving, drukveranderingen en rek in meerdere richtingen. Zelfs de beste geborduurde ontwerpen raken na slechts een paar weken normaal gebruik vaak uit vorm of raken los. Geribbelde boorden en elastische banden vormen eveneens een probleemgebied, omdat ze geen consistente vezelrichting hebben. De natuurlijke rekbaarheid van deze materialen kan de steken tijdens het dragen met 15 tot wel 30 procent uitrekken, waardoor gedetailleerde patronen vaag en misuitgelijnd lijken. Ook de voetboog vormt een uitdaging, aangezien de gebogen vorm plekken creëert waar strak borduurwerk zich ofwel over zichzelf vouwt of geheel loslaat. Uit praktijktests blijkt dat elk ontwerp dat op deze lastige plaatsen is aangebracht ongeveer drie keer sneller uit elkaar valt dan eenvoudiger geplaatste ontwerpen op vlakke delen van de sok, zoals de bovenrand van de boord.
Digitalisering van beste praktijken om precisie te waarborgen bij op maat gemaakte geborduurde sokken
Stiksel met lage dichtheid, trekcompensatie en strategische onderlaag voor microtekst en ingewikkelde motieven
Het juist digitaliseren is van groot belang bij het maken van op maat gemaakte geborduurde sokken. Steken met een lage dichtheid helpen de draaddikte te verminderen, zodat de stof niet vervormt, wat vooral belangrijk is voor die elastische breistoffen waar we allemaal zo van houden om te dragen. De functie voor trekcompensatie werkt door de positie van de steken op de stof aan te passen om spanningproblemen tegen te gaan, waardoor kleine teksten en delicate contouren scherp en correct gepositioneerd blijven. Bij onderliggende steekpatronen komt ook strategisch denken kijken. Een randloop-onderlaag fungeert in feite als lijm voor satijnborders en houdt alles netjes bij elkaar. Een zigzag-onderlaag verricht vergelijkbaar werk voor gevulde gebieden, zonder dat deze stijf of oncomfortabel aanvoelen. Bij zeer kleine tekst onder de 3 mm zorgt het verkorten van de satijnsteken tot tussen de 0,8 en 1,2 mm ervoor dat de letters leesbaar blijven, terwijl de sok toch natuurlijk kan buigen. Al deze kleine details zorgen ervoor dat complexe ontwerpen standhouden tijdens meerdere wasbeurten en gebruiksperiodes, en daadwerkelijk onderdeel worden van het kledingstuk zelf, in plaats van slechts als versiering bovenop te liggen.
Technische beperkingen van borduren op sokken: minimale afmeting van details (1,2 mm), duidelijkheidsdrempels en maatregelen tegen het ontstaan van draadknopen
Bij het borduren van sokken worden er door de natuurkunde zelf echte beperkingen opgelegd. Elk motief kleiner dan 1,2 mm werkt gewoon niet goed. Dergelijke fijne details verdwijnen volledig, raken beschadigd tijdens het wassen of zijn simpelweg onzichtbaar. Voor leesbare tekst is een minimale letterhoogte van 3 mm vereist. En vergeet niet voldoende ruimte te laten tussen de verschillende onderdelen van het ontwerp. Als de elementen te dicht op elkaar staan (minder dan 1,5 mm uit elkaar), lopen ze samen tot één onoverzichtelijke massa. Een veelvoorkomend probleem waar mensen mee te maken krijgen, is wat wij ‘birdnesting’ (vogelnestvorming) noemen: de draad raakt verward onder het oppervlak van de stof. Dit gebeurt meestal door ongelijke spanningsinstellingen, onjuiste steunringtechnieken of versleten naalden. Om dit vervelende probleem te voorkomen, richt u zich in eerste instantie op drie belangrijke zaken: het juist instellen van de machinespanning (zowel de boven- als de onderdraad moeten evenwichtig zijn), het gebruik van polyesterdraden met een uniforme dikte over de gehele lengte, en het zorgvuldig en plooienvrij inspannen van de stof in de steunring. Vergeet ook niet regelmatig de naald te vervangen: wissel deze elke 8 tot 10 uur daadwerkelijke bedrijfstijd. Deze eenvoudige maatregelen helpen om een consistente kwaliteit te behouden, zelfs bij grootschalige productie, en voldoen bovendien aan de eisen van ISO 13629-1 met betrekking tot de duurzaamheid van geborduurde textiel.
Materiaal- en draadkeuze voor duurzame, hoogwaardige, op maat geborduurde sokken
Stoffenbasis
Het soort stof dat de basis van een sok vormt, beïnvloedt in hoge mate hoe goed deze bij elkaar blijft zitten, hoe comfortabel deze aanvoelt en hoe lang deze meegaat. Katoen is uitstekend voor luchtdoorlatendheid en werkt goed voor borduurwerk, maar het probleem van krimpen na meerdere wasbeurten blijft altijd bestaan. Polyesterblends zijn beter bestand tegen slijtage op belaste plekken zoals de hiel en de tenen. Ze behouden ook de kleuren veel langer fris dan katoen, waardoor vervaging mogelijk met ongeveer twee derde wordt verminderd. Dit heeft echter wel een nadeel: polyester voert vocht minder effectief af. Merinowol onderscheidt zich doordat deze op natuurlijke wijze de lichaamstemperatuur reguleert en zijn vorm behoudt, zelfs na rekken; dit maakt het ideaal voor gedetailleerde patronen wanneer we speciale draadtechnieken gebruiken. Het toevoegen van nylonversterking tussen de 15 en 20 procent versterkt de prestaties van sportsocken, terwijl ze toch comfortabel kunnen buigen en bewegen. Daarom kiezen veel sporters en mensen die medische ondersteuningssokken nodig hebben vaak voor deze combinatie bij hun op maat gemaakte geborduurde voetbedekking.
Draadtechniek
De keuze van de draad verbindt artistieke bedoeling met mechanische realiteit:
- Dikte : Polyesterdraden van 40–50 wt bieden de optimale balans—ze zorgen voor volledige dekking terwijl ze de omvang minimaliseren die de drapé van sokken in gevaar brengt
- Samenstelling : Polyesterkernen presteren beter dan rayon en katoen op het gebied van treksterkte en UV-bestendigheid, waardoor de kleurintegriteit behouden blijft gedurende meer dan 50 wasbeurten
- Elasticiteit : Draad met lage rek voorkomt rimpeling op gebreide ondergronden—essentieel om leesbaarheid te behouden bij tekst kleiner dan 3 mm
- Glans : Draden met een mat afwerking elimineren spiegelglans die fijne details verstoort onder omgevings- of winkelverlichting
Het prioriteren van pluisbestendige, UV-stabiele draden die zijn afgestemd op de vezelsamenstelling van uw sokken, zorgt ervoor dat ontwerpen dagelijks gebruik doorstaan en tegelijkertijd visuele helderheid behouden—waardoor functionele kleding wordt omgezet in een consistent gemerkte, hoge-resolutie expressie.
Inhoudsopgave
- De juiste stabilisatie- en hoopingmethode kiezen voor aangepaste geborduurde sokken
- Optimale plaatsing en afmeting van het ontwerp voor op maat geborduurde sokken
- Digitalisering van beste praktijken om precisie te waarborgen bij op maat gemaakte geborduurde sokken
- Materiaal- en draadkeuze voor duurzame, hoogwaardige, op maat geborduurde sokken